Friday, January 11, 2013
I wanted to post some of my favorite Winogradsky experiments that I've found so far, if you feel like responding, please add others that you've seen: There was a page that no longer exists from the Woodrow Wilson Foundation Leadership Program for Teachers, but here are some links that are equally good funded by the Foundation: http://www.yale.edu/ynhti/curriculum/units/2010/3/10.03.02.x.html#n and https://www.nabt.org/websites/institution/File/pdfs/american_biology_teacher/2005/067-06-0348.pdf.
The BioCurious Meetup Group also posted a nice Winogradsky image from a Brad Bebout workshop has some really beautiful growth!
I like this lesson plan as well, posted by Christine L. Case, Ed.D., a Biology Professor at Skyline College. I think it's set up for a community college class, but it could probably be done in almost any classroom (or at home!).
Definitely a new favorite website of mine, the Center for Dark Energy Biosphere Investigations posted this blog in 2011 with some excellent thoughts on where to gather your mud and microbes. And how sad I am to have missed this Adopt A Microbe project that they put on that year. What an excellent classroom activity! It might be worth following anyway, even if you missed it in real time. Also, because I found this site fascinating, any teachers out there might be interested in their additional teacher resources and links.
Here is NASA's informational video on how to build a Winogradsky Column - a must watch for any microbe geek out there!
And my final recommendation for the day will be this animation by Carleton College.
Have fun with your microbes and don't forget to post pictures and blog about what happens!

Tuesday, May 5, 2009
Final Microbial Fuel Cell Report


Description
Microbial Fuel Cells (MFC) work because some of the bacteria (exoelectrogens) found in creek and marine sediment can produce free electrons and these can generate electricity. The microbial activity in my fuel cell continued to be much more significant and interesting than in my spring Winogradsky column. The fuel cell was created using my most active Winogradsky column from last fall. The entire process has been interesting and I would definately do this with a class. Even smaller children enjoy it, as my son, who is in 2nd grade, helped me with the measurements and was able to understand the basic idea that tiny organisms in the mud were creating small amounts of electric current.
Materials and Methods
I used the methods described by Josh McCready and Tess Edmonds at the Geobacter Website: http://www.emunsing.com/portfolio/portfolio_content/44_designLab/MFC_Report.pdf to build my fuel cell with some minor adjustments due to materials availability.*
It is important to note that there are many different configurations and materials employed in constructing an MFC and new methods are being developed all over the world. For the purposes of this class and any use for younger children, I thought it would be best to follow a simple design with the fewest and simplest materials. I therefore followed the idea from the Geobactor site of constructing a sediment MFC, which simply uses sediment as a biomass and bacteria source (anodechamber), the overlying water as a substrate (cathode chamber), and the finer top sediment as a membrane to separate these two ‘chambers’.
Materials used:
- Mud and water originally taken from Bear Creak
- One 24 ounce spaghetti sauce jar
- The anode and cathodes were made with graphite pencils from the art store (the research paper called for carbon paper, but the graphite pencils were cheap and easy to obtain). I used the graphite bricks, as opposed to the thinner pencils.
- Two common metal nuts and bots
- Insulated electrical wire
- Common household sealant
- 1/2 teaspoon of sugar
- 1k-Ohm Metal-Oxide Resistor
Results
The MFC has not ever shown a significant voltage, however it has consistently maintained a small voltage since the beginning. By adding sugur or vinager throughout the nine weeks of this experiment, I have seen increased activity on a consistent basis. The most recent results for the voltage are:
4.03.09 0.950 V (immediately after adding vinegar to the MFC)
4.04.09 0.050 V
4.07.09 0.060 V
4.12.09 0.050 V
4.16.09 0.025 V
4.23.09 0.023 V
4.30.09 0.027 V
5.04.09 0.028 V
Conclusion
While there was a slight increase in voltage once the MFC was moved outside and vinager added, my MFC did not display what Josh McCready and Tess Edmonds describe as the results of a "true" fuel cell which include, 1. gradual increased voltage over time as the bacteria populate the electrode, 2. I did not take measurements within any 24 hour period, so I can not varify that the measurements would have oscillated during a 24 hour period as McCready and Edmonds suggest they should (indicating that the microbes go through natural daily cycles of activity), finally, they suggest completely sterilizing the MFC to prove that it will go to zero, validating that the microbes were generating electrical current while alive. I did not do this either.
However, my results due seem to indicate that with further effort, including day and night sampling, regular feeding of the bacteria, and having more than one cell to compare, I may have been able to provide a stronger argument that the fuel cell is an effective generator of electricity. I would also like to attempt to connect it to a small light or toy to prove its effectiveness.
This would be a terrific activity for a class, perhaps creating Winogradsky columns in the first semester and then making them into MFCs in the second semester as a way to complete a unit. I would definately want to havemore MFCs to compare results with and have at least a full three months time to demonstrate the activity with a class.
* The site referenced above is no longer active, but here is a good substitute on the Instructables website: http://www.instructables.com/id/Microbial-Fuel-Cells-A-Way-to-Generate-Clean-Elect/
Final Spring Winogradsky Column Report

Column description
My spring Winogradsky column has left a lot to be desired. There has been very little noticible activity after the cheese turned white, other than a very strong odor coming from the column and forcing me to put it outside. Unlike my previous columns from the fall, this column resulted in few changes in color throughout the ten weeks of the experiment.
Materials and Methods
I used the method described from the Penn State profile: http://www.personal.psu.edu/faculty/j/e/jel5/biofilms/winogradsky.html.
- One column constructed of soil or mud from virtually any source
- Water from the same or a different source
- To these natural components, are added supplemental carbon and sulfur.
- Above the soil is a layer of water and the column is usually covered to retard evaporation.
- The entire column is then illuminated to encourage the growth of phototrophs.
For materials, I used:
- Mud from a backyard puddle
- Puddle water
- Glass vase
- Cut grasses for the carbon source
- Cheese for the sulfer source
Amost immediately the cheese in the middle of the column turned extemely white and has remained so for the entire 10 week experiment. I suggested that these might be some form of fungi - or some form of chemoorganoheterotrophs because they are feeding on organic carbon, light as well as the carbon, and using the carbon for their e- source. I saw no sign of the green or rust colored activity that was so prevalent in my column last semester.
On the surface of the water a thin layer of white biofilm and strong oder began within the first three weeks. Since, the water in the column has overflowed once and the film has turned green with a spiderweb-like subsistance. According to the Microbial World website by Jim Deacon, the layer of biofilm on the surface should be sheathed bacteria.
Conclusion
Considering that there were few other signs of life beyond the cheese fungus, the environment in my column might have been too extreme. I did not take a ph sample, but this might have given me an idea of what the reasons for such little activity were. Possibly the sheathed bacteria were better protected to survive in my tiny extreme environment. For a classroom activity, I liked using a smaller container for myself, but I think that the larger columns would be easier to deal with with children. Also, I would want to have one or more controls available and mud from different environments as well as other carbon and sulfer sources. Possibly I simply did not provide enough cut grass for carbon nutrients.
Thursday, April 2, 2009
April 2, 2009: Two updates (pictures to follow):
Microbial Fuel Cell Update: My fuel cell has had very low readings throughout, though I have not been “feeding” the microbes and so I will start a regiment of trying to add vinegar once a week. Interestingly, as a Winogradsky column, this mud and water was not particularly active or smelly, but since I’ve moved it over to the jar and fed it the first batch of sugar, the water has been dark and cloudy for over a month and the smell is so bad I finally had to put it outside. Since being outside, I’ve seen a small jump in voltage. I'm not sure if that's because it's been exposed to more light or it's a coincidence. After learning about the corosion on some of the other MFC projects, I did open the jar and take out the graphite cathode in the water column to check, but it seems to have undergone no corrosion.
3.09.09 0.003 V
3.14.09 0.003 V
3.18.09 0.002 V
3.21.09 0.001 V(column moved outside)
3.23.09 0.001 V
3.28.09 0.004 V
4.01.09 0.004 V
Spring Winogradsky Column UpdateThis column has undergone almost no change since the cheese initially turned white. I have it tightly capped off, and I’m afraid of opening it for the smell. The film on the surface of the water is thicker now and also colored white, but even the water column has not changed much in color. It has just recently started to go a little bit yellow. There is a lot less change than I had detected with my original Bear Creek columns, so I’m wondering if the puddle in my backyard was not as active as Bear Creek or maybe I haven’t given them the right growth materials.
Microbial Fuel Cell Update: My fuel cell has had very low readings throughout, though I have not been “feeding” the microbes and so I will start a regiment of trying to add vinegar once a week. Interestingly, as a Winogradsky column, this mud and water was not particularly active or smelly, but since I’ve moved it over to the jar and fed it the first batch of sugar, the water has been dark and cloudy for over a month and the smell is so bad I finally had to put it outside. Since being outside, I’ve seen a small jump in voltage. I'm not sure if that's because it's been exposed to more light or it's a coincidence. After learning about the corosion on some of the other MFC projects, I did open the jar and take out the graphite cathode in the water column to check, but it seems to have undergone no corrosion.
3.09.09 0.003 V
3.14.09 0.003 V
3.18.09 0.002 V
3.21.09 0.001 V(column moved outside)
3.23.09 0.001 V
3.28.09 0.004 V
4.01.09 0.004 V
Spring Winogradsky Column UpdateThis column has undergone almost no change since the cheese initially turned white. I have it tightly capped off, and I’m afraid of opening it for the smell. The film on the surface of the water is thicker now and also colored white, but even the water column has not changed much in color. It has just recently started to go a little bit yellow. There is a lot less change than I had detected with my original Bear Creek columns, so I’m wondering if the puddle in my backyard was not as active as Bear Creek or maybe I haven’t given them the right growth materials.
Monday, March 2, 2009
Quick Update on the New Column
For a quick update on my new, but simplistic, Winogradsky column, there is a photo attached here. Also, note several areas of white growth throughout the column. Most prominant is the one shown in the photo here, which seems to be clearly working on the cheese, and is also the side facing the light. These must be the fungi - or at least they are chemoorganoheterotrophs because they are feeding on organic carbon, light as well as the carbon, and using the carbon for their e- source. I partly say this because they are smack in the middle of the column and so theye strict anaerobs. Here is the photo: 
Sacrafice for the Fuel Cell!
I finally have gone and done it. I've sacrificed my favorite Winogradsky Column to the greater good - it is now a microbial fuel cell in the making. I've been carefully considering the methods used by my classmates and have finally settled on this protocol:
I found this through the Internet geobacter site (www.geobacter.org), which has some excellent links if you scroll down and also a video clip that I hadn't noticed the first time I went to the site.
Anyway, I used the following protocol which is to somewhat of a hybrid between the report above, my husband's engineering skills, and what I read from the other students:
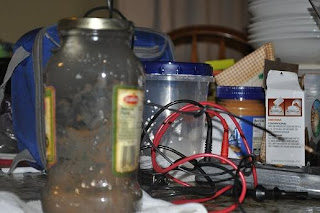
Here is a photo of some of the supplies on our kitchen counter.

I created one very small microbial fuel cell using the my Winogradsky column from the fall semester, whose original contents were from Bear Creak. If I had mentioned before that there was no significant smell from this column, I was apparently not poking around enough. There was plenty of sulfuric smell coming from the column as I transferred it and the corresponding creak water into the MFC container. I used a 24 ounce spaghetti sauce jar.
The anode section of the cell was made with a graphite pencil from the art store. The protocol in the research paper asks for carbon paper, but since our entire class is using graphite, I went with graphite. We also drilled all the way through the graphite and used a nut and bolt to connect the electrical wire. Because my husband, the airplane mechanic, was convinced that this would work, we then coated this area with sealant to help protect against corrosion. Since we had used a nut and bot to connect the wire, we did not use an additional connective epoxy. The anode section was then gently placed in the sediment and covered with it at the bottom of the jar. I mixed about a 1/2 teaspoon of sugar into the mud while doing this.
The water from the column was added to the jar until it filled the jar to the surface. The Cathode was placed in immediately after. It was made in the same way as the anode. A 100 ohm resistor was placed between the wires. I tested the volts immediately after putting everything together (too soon)? I'm going to need to get guidance on the voltmeter. I am not sure what measurement everyone is using, but I read 9 micro volts initially and after 3 hours I'm down to about 3 micro volts. We'll see how this goes with time!
Here is a picture of the wires connected to the two graphite pencils:

Here are the anode and cathode hanging off the drill while the sealant dries:

Here is a close-up photo of my poor, sacrificed Winogradsky Column after I siphoned off the water, prior to shoveling the mud into the jar:

Here is the final product, hopefully a solid work of art and advancement for the future of mankind:
Friday, February 27, 2009
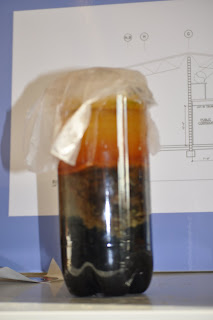
Here is an updated look at my most active fall Winogradsky Column, which is still sitting in the window in my office. This is not a great shot, but you can make out some of the colors in the mud where there should be a mixed area of aerobic and anaerobic activity. This is especially true because I have so much water in this column. Not that much activity can be seen from possible anaerobes at the very base of the bottle, however a broad growth of clearly phototrophic organisms ( greenish, red mass) is growing on the side that always faces the window. I'm guessing that the lowest layers indicate some growth of chemoautotrophs, organisms that are using fermentation. Apparently my rubber band disintegrated and I'll have to get a new one. Also, I think it's important to note that there is no smell coming from this column, though there was a point in the past when it did have a distinctly unpleasent odor.

Wednesday, February 25, 2009
Spring Winogradsky Column
For the Environmental Microbiology Spring Course, I am posting a temperary blog on a simple Winogradsky Column. This one follows the very basic descriptions from this site: http://www.personal.psu.edu/faculty/j/e/jel5/biofilms/winogradsky.html that has been recommended for the course.
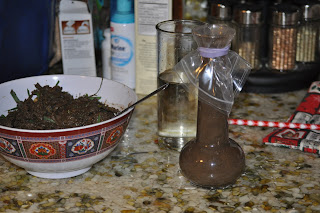
Mixing the mud, grass, and cheese:

New column in glass vase. I had to work pretty hard to get all the air pockets out of this one, so bad choice overall, but I still like the way it looks.
One more of just the column before going back to the window sill:
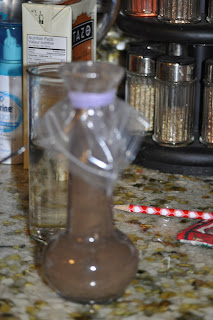
I used mud from a growing puddle that has been forming right next to our pool over the last month and puddle water. I am using a glass vase that is smaller and filled greater than 2/3 of it with the mud. I used cut grasses/weeds that were growing right next to the puddle for the carbon source and cheese for the sulfer source. These were the only materials that I used in this one. We'll see what happens. I am going to try and put this column up against a light source for the duration. There is a small airspace at the top of the column.
The top of the column, being in touch with the airspace and water is already aerobic, but it is anaerobic at the bottom and mixed inbetween. If everything works correctly, and I have sulfate reducing bacteria in the mud, they will settle towards the bottom, more anaerobic section of the column and produce hydrogen sulfide gas.
Mixing the mud, grass, and cheese:

New column in glass vase. I had to work pretty hard to get all the air pockets out of this one, so bad choice overall, but I still like the way it looks.

One more of just the column before going back to the window sill:

Saturday, November 29, 2008
Day 52 Observations
Winogradsky Summary for Fall Semmester:
I created 4 Winogradsky columns to see if I could show some of the various ways that microbes can survive, including in both aerobic (with oxygen) and anaerobic (without oxygen) conditions.
Column CA: In the mud in this column I placed shredded filter paper (carbon or cellulose source), magnesium sulfate (sulfur source), baking soda (sodium bicarbonate) and one crushed multivitamin pill. This column was placed in my kitchen window.
Column CB: This column was created the same as column CA, however it was enclosed in a box and kept away from light. The intent of this mixture was to provide an environment where chemosynthetic organisms could thrive without light.
Column WA: This column I mixed mud with cut grass (carbon/cellulose source) and the magnesium sulfate. Column WA was placed in the window next to column CA.
Column WB: This column was mixed the same as column WA, however it was placed in the box and kept out of the light with column CB.
After 52 days, I have seen column CA go through several stages of apparent growth. The water column at the surface went completely black for about 1 week and now has become clear again. The mud has remained almost totally black throughout, though for a few weeks there was some white areas within the upper level of the mud, closer to the water column. A thin film has remained on the surface of the mud throughout. The film was originally a whitish/greenish color and now is a thicker film that is red in color. There are red particles floating in the water column. The column has an rotten-egg like odor.
Column WA has gone through more changes. At one point the water column had taken on a foggy redish hue, but now the water is clear again. There is now a thick red film at the surface and thick red layers in the mud on the side facing the window. This column does not have a strong odor.
There has been very little change in either columns’ WB or CB. Neither column has a distinguishable smell. Both columns did go through some color change in the water column, however this was not as dark black as column WA went through. Both columns have maintained a thin film on the surface of the mud. Column WB has a thicker, redder film.
I found it very exciting to look at samples in a microscope and would recommend this part to any classroom experiment. It would be even better to have an opportunity to try to identify the microbes through isolation and gram staining.
Altogether, I think that the columns will take several more months before they can show the type of nutrient cycling and photosynthetic vs. chemosynthetic growth that the columns are known for.
Here is a photo of the surface of column WA this week:

Here are two photos of the side that has been exposed to light:


Here is a photo of the side that has been opposite the window:

In retrospect, I would have liked to use a different protocol, a contorol, and different carbon sources. I also notice that neither protocol called for a nitrogen source, so you can not follow the nitrogen cycle and it may have limited the types of bacteria that thrived in my columns. I have since found two sites that I would probably use with a class & that have a much better description of the protocol to use with students: 1. http://www.kabt.org/wp-content/uploads/2008/01/winogradsky-for-kabt-web-site.pdf
2. http://www.sciencebuddies.org/science-fair-projects/project_ideas/Geo_p038.shtml
For perspective, I also liked this site: http://steel.ced.berkeley.edu/research/hidden_ecologies/?p=31 from the Exploratorium’s Invisible Dynamics Project. This will be something to follow over time though because they’ve just got started.
I created 4 Winogradsky columns to see if I could show some of the various ways that microbes can survive, including in both aerobic (with oxygen) and anaerobic (without oxygen) conditions.
Column CA: In the mud in this column I placed shredded filter paper (carbon or cellulose source), magnesium sulfate (sulfur source), baking soda (sodium bicarbonate) and one crushed multivitamin pill. This column was placed in my kitchen window.
Column CB: This column was created the same as column CA, however it was enclosed in a box and kept away from light. The intent of this mixture was to provide an environment where chemosynthetic organisms could thrive without light.
Column WA: This column I mixed mud with cut grass (carbon/cellulose source) and the magnesium sulfate. Column WA was placed in the window next to column CA.
Column WB: This column was mixed the same as column WA, however it was placed in the box and kept out of the light with column CB.
After 52 days, I have seen column CA go through several stages of apparent growth. The water column at the surface went completely black for about 1 week and now has become clear again. The mud has remained almost totally black throughout, though for a few weeks there was some white areas within the upper level of the mud, closer to the water column. A thin film has remained on the surface of the mud throughout. The film was originally a whitish/greenish color and now is a thicker film that is red in color. There are red particles floating in the water column. The column has an rotten-egg like odor.
Column WA has gone through more changes. At one point the water column had taken on a foggy redish hue, but now the water is clear again. There is now a thick red film at the surface and thick red layers in the mud on the side facing the window. This column does not have a strong odor.
There has been very little change in either columns’ WB or CB. Neither column has a distinguishable smell. Both columns did go through some color change in the water column, however this was not as dark black as column WA went through. Both columns have maintained a thin film on the surface of the mud. Column WB has a thicker, redder film.
I found it very exciting to look at samples in a microscope and would recommend this part to any classroom experiment. It would be even better to have an opportunity to try to identify the microbes through isolation and gram staining.
Altogether, I think that the columns will take several more months before they can show the type of nutrient cycling and photosynthetic vs. chemosynthetic growth that the columns are known for.
Here is a photo of the surface of column WA this week:

Here are two photos of the side that has been exposed to light:


Here is a photo of the side that has been opposite the window:

In retrospect, I would have liked to use a different protocol, a contorol, and different carbon sources. I also notice that neither protocol called for a nitrogen source, so you can not follow the nitrogen cycle and it may have limited the types of bacteria that thrived in my columns. I have since found two sites that I would probably use with a class & that have a much better description of the protocol to use with students: 1. http://www.kabt.org/wp-content/uploads/2008/01/winogradsky-for-kabt-web-site.pdf
2. http://www.sciencebuddies.org/science-fair-projects/project_ideas/Geo_p038.shtml
For perspective, I also liked this site: http://steel.ced.berkeley.edu/research/hidden_ecologies/?p=31 from the Exploratorium’s Invisible Dynamics Project. This will be something to follow over time though because they’ve just got started.
Wednesday, November 12, 2008
Two weeks ago our lab manager helped me to use a light microscope with the computer link to take these pictures of some of my little "bugs". I only took samples from my #2 Column that is exposed to daylight. We had to use the phase contrast at 100x and add oil to the slide in order to really get a sense of what we were looking at. I also found it challenging to get a small enough sample out of the mud to be able to put it on the slide & actually see anything. Our lab manager helped me with everything & mentioned that in the first year microbiology class they are doing Winogradsky columns, but they also go through the process of isolating cell colonies on agar plates so that they have an easier time with identification. He said that for the class they use the streak-plate technique. Microbes obtained from sample aproximately 1/2 inch in mud column. Unfortunately I did not want to take up my hosts time with a staining activity (nor did I want to reveal my ignorance to the process), but that would have been even more effective in identifying what I've got here. I think if I were to do this with a class I would want to isolate some colonies and then perform gram stains to look at them.
 1 micrometer =aproximately "-" on photo.
Here, I beleive you can see several living microbes taken in the picture. While looking through the microscope you could see quite a bit of movement. Most of my microbes appear to be rod shape and motile. Though there are several cocci or spherical cells.

In the lower center of the screen is a cocci shape that was pretty common with a center "nucleoid" area. It is clear that I need to purchase a microbe field guide, but even then I doubt I have the skill to satisfactorily identify these little bugs. A type of spherical cell that might be found in the conditions of my Winogradsky column could be a Micrococcus species. I pick this as a possible species because according to "A Short Guide to Some Bacteria Genera", by Harold Eddleman, Ph.D., Micrococcus species are very common in soil and dust. The colonies are also pale yellow or orange - which would match what is starting to appear in my 2nd column. They are non-motile, no spores, and aerobic which could all fit. Again, this is a sample species that might be considered, I am not going to try to identify it for real!

This is my favorite picture. The long cell shows up quite nicely and you can see the cell wall and several cellular structures inside the cell. There were several of these, but this was the best shot we got & I was unable to find it on my own (lack of patience)? For this microbe, I am going to refer to the website Microbe Wiki, http://microbewiki.kenyon.edu/index.php/Beggiatoa, for my sample species. Here I am going to highlight Beggiatoa species because of the look of the cells found on this and other sites and because the Wiki definition has this to say, "Beggiatoa is a genus of colorless, filamentous proteobacteria. With cells up to 200 microns in diameter, species of Beggiatoa are among the largest prokaryotes. They are one of the few members of the chemosynthesizers, meaning that they can synthesize carbohydrates from carbon dioxide and water using energy from inorganic compounds. Beggiatoa are found in polluted marine environments, and can be seen by the naked eye as a white filamentous mat on top of the water as a sign of environmental deterioration." I liked this description, but I don't believe I have such a mat anywhere within my column - this might rule out Beggiatoa. Also good to note that the photos on the Wiki site can be found at the Cyanobacterial Image Gallery: http://www-cyanosite.bio.purdue.edu/images/images.html.

Last, but not least, I think that the image in the middle center is another rod shaped cell with a polar flagella, there were also a number of these to be found in our samples, but this was the best shot we were able to get. I like the sample microbe that I found to highlight in this category: Rhodospirillum species. These are large spiral cells with very rapid motility and a spinning movement. According to the "Short Guide", they will grow on yeast media in the dark microaerophilically with pale white color. In the presence of light, they grow a purple or maroon color in medium anaerobically via photosynthesis. They develop huge populations in algae covered sewage ponds and can also be found in pond muds.
 1 micrometer =aproximately "-" on photo.
Here, I beleive you can see several living microbes taken in the picture. While looking through the microscope you could see quite a bit of movement. Most of my microbes appear to be rod shape and motile. Though there are several cocci or spherical cells.

In the lower center of the screen is a cocci shape that was pretty common with a center "nucleoid" area. It is clear that I need to purchase a microbe field guide, but even then I doubt I have the skill to satisfactorily identify these little bugs. A type of spherical cell that might be found in the conditions of my Winogradsky column could be a Micrococcus species. I pick this as a possible species because according to "A Short Guide to Some Bacteria Genera", by Harold Eddleman, Ph.D., Micrococcus species are very common in soil and dust. The colonies are also pale yellow or orange - which would match what is starting to appear in my 2nd column. They are non-motile, no spores, and aerobic which could all fit. Again, this is a sample species that might be considered, I am not going to try to identify it for real!

This is my favorite picture. The long cell shows up quite nicely and you can see the cell wall and several cellular structures inside the cell. There were several of these, but this was the best shot we got & I was unable to find it on my own (lack of patience)? For this microbe, I am going to refer to the website Microbe Wiki, http://microbewiki.kenyon.edu/index.php/Beggiatoa, for my sample species. Here I am going to highlight Beggiatoa species because of the look of the cells found on this and other sites and because the Wiki definition has this to say, "Beggiatoa is a genus of colorless, filamentous proteobacteria. With cells up to 200 microns in diameter, species of Beggiatoa are among the largest prokaryotes. They are one of the few members of the chemosynthesizers, meaning that they can synthesize carbohydrates from carbon dioxide and water using energy from inorganic compounds. Beggiatoa are found in polluted marine environments, and can be seen by the naked eye as a white filamentous mat on top of the water as a sign of environmental deterioration." I liked this description, but I don't believe I have such a mat anywhere within my column - this might rule out Beggiatoa. Also good to note that the photos on the Wiki site can be found at the Cyanobacterial Image Gallery: http://www-cyanosite.bio.purdue.edu/images/images.html.

Last, but not least, I think that the image in the middle center is another rod shaped cell with a polar flagella, there were also a number of these to be found in our samples, but this was the best shot we were able to get. I like the sample microbe that I found to highlight in this category: Rhodospirillum species. These are large spiral cells with very rapid motility and a spinning movement. According to the "Short Guide", they will grow on yeast media in the dark microaerophilically with pale white color. In the presence of light, they grow a purple or maroon color in medium anaerobically via photosynthesis. They develop huge populations in algae covered sewage ponds and can also be found in pond muds.
Currently, Column #1 has not changed much, though the water has returned to clear color, but column #2 has begun to show a variety of colors and the water has maintained it's redish hue. There is no strong smell coming from any of the columns. The columns in the dark have not developed a distinctive color change. More photos on these to be posted later.
Sunday, November 2, 2008
Day 25: These photos show some of the changes that have been going on for the last few weeks. The algae in the water column seems to have multiplied in both bottles, but more noticeably in the chemosynthetic protocol column where the water appears black. The 2nd column seems to have maintained its orange tint. By following the simple diagram listed at: http://www.biology.ed.ac.uk/research/groups/jdeacon/microbes/winograd.htm I might be safe in assuming that both columns have a healthy growth of green and purple sulfur bacteria at the surface of the mud and that the 1st column has a bloom of the purple non sulfur bacteria in the water column. Possibly I have been able to promote the growth of the sulfur reducing bacteria in the first column and that might also explain the color.

Column 2: Typical Winogradsky column with cut grass & magnesium sulfate

Column 1: Chemosynthetic protocol with filter paper, magnesium sulfate, baking soda, and crushed vitamin

The two columns in the enclosed box where they are not exposed to light have shown little change, however the water column is tinted orange in both.

The 2nd column or column with grass has a thicker layer of growth at the surface of the mud and more appearance of growth just below the surface. This was not as I would have expected, as it is the chemosynthetic column that has baking soda and vitamins which were both intended to assist in microbial growth without sunlight.

I have not had a chance to check the temperature or look at any of it under a microscope yet, but I hope to be able to do so this week. I am still looking to answer why I might have so much "white" growth around the edges of the grass in the 2nd column, for which my first guess has been mold or a type of fungus.

Column 2: Typical Winogradsky column with cut grass & magnesium sulfate

Column 1: Chemosynthetic protocol with filter paper, magnesium sulfate, baking soda, and crushed vitamin

The two columns in the enclosed box where they are not exposed to light have shown little change, however the water column is tinted orange in both.


The 2nd column or column with grass has a thicker layer of growth at the surface of the mud and more appearance of growth just below the surface. This was not as I would have expected, as it is the chemosynthetic column that has baking soda and vitamins which were both intended to assist in microbial growth without sunlight.

I have not had a chance to check the temperature or look at any of it under a microscope yet, but I hope to be able to do so this week. I am still looking to answer why I might have so much "white" growth around the edges of the grass in the 2nd column, for which my first guess has been mold or a type of fungus.
Monday, October 13, 2008
Day 5 of columns since adding mud
I'm posting these photos of Day 5 since I added the more correct portion of mud to water. Already I seem to be getting quite a bit of activity if the water color itself has anything to do with it. I am also seeing small blotches of dark and light color on the side of the columns that get more light. I should point out that my kitchen window does not get a lot of light, so it will be interesting to see how well my columns do.
Shown here are the two columns side by side. The column on the left is the chemosynthetic bacteria experiment (CA) and on the right is the traditional Winogradsky column with grass as the carbon source (WA).

The WA experiment still has fairly clear water, though some algea seem to be growing in it. A layer of brick red growth seems to be forming on the surface of the mud. Color changes that appear to be due to growth of bacteria may also be occuring within the mud column where grass is available.

The second column, the CA experiment has a darker red coloring throughout the water column, the coloring should be. Is this growth due to cyanobacteria or other algea? In the "aerobic zone" at the surface of the mud, a thin film has emerged. The color is greenish. In this column, the indication of bacterial growth on the filter paper is not as immediately apparent, though there are some color blotches.

Shown here are the two columns side by side. The column on the left is the chemosynthetic bacteria experiment (CA) and on the right is the traditional Winogradsky column with grass as the carbon source (WA).

The WA experiment still has fairly clear water, though some algea seem to be growing in it. A layer of brick red growth seems to be forming on the surface of the mud. Color changes that appear to be due to growth of bacteria may also be occuring within the mud column where grass is available.

The second column, the CA experiment has a darker red coloring throughout the water column, the coloring should be. Is this growth due to cyanobacteria or other algea? In the "aerobic zone" at the surface of the mud, a thin film has emerged. The color is greenish. In this column, the indication of bacterial growth on the filter paper is not as immediately apparent, though there are some color blotches.

Monday, September 29, 2008
My Winogradsky Protocol
For my Winogradsky expiriment, I am trying out two different protocol. I have used four 1 litter water bottles - two using a protocal from the NASA site - Chain or web? grow chemosynthetic bacteria - which can be found at: www.bigelow.org/foodweb/chian4.html. This protocol is primarily concerned with whether or not photosynthesis is the only way to make food. This experiment is meant to show how bacteria will oxidize hydrogen sulfide to produce carbohydrates without any sunlight involved. I like this version because it is set up as a lesson plan for teachers. There are learning objectives, procedures, and extension activities. I was not thrilled about the procedure section though because I found it a little difficult to follow having never done one of these before. I also substituted the call for Plaster of Paris (CaSO4) with magnesium sulfate, which I am assuming will work out ok.
For both protocols I collected mud and creek water from Bear Creek in downtown Merced. I was relieved to find that there was enough water still in the creek to collect this late in the year (we haven't had rain for a long time and probably won't until the beginning of November).
For the first protocol, I combined about 4 grams of magnesium sulfate with enough mud from the creek to fill the first 1/3 of my water bottles. I stirred it in a container and then mixed it with filter paper strips. The procedure calls for lab filter paper, which I substituted with coffee filter paper - again, I'm not too sure how well this substitution will work out. I transferred the mud mixture to the water bottles and added the creek water. Then added .2 grams of baking soda and one crushed multivitamin pill. I attempted to remove air bubbles, but I did not feel highly successful in doing so. I let the bottles sit for about 30 minutes and then poured off a little bit of water and covered with plastic wrap and a rubber band. I marked one to sit in sunlight and one to be closed in a box.
For the second protocol I used the instructions from one of the links provided: http://www.personal.psu.edu/faculty/j/e/jel5/biofilms/winogradsky.html, which was apparently created by a Penn State faculty member. I think this protocol is a more traditional source of directions on the Winogradsky Column. For this protocol I used the same mud and creek water and also mixed the mud with magnesium sulfide. However, for the carbon source, I used one of the other recommendations - cut grass. These instructions do not include the use of baking soda or vitamins. I marked both of these bottles as well for one in sunlight and one in the closed box.
Here are the bottles right after mixing, prior to settling as well as a top down image:


The bottles looked like this last night in my window, I think it's clear that I missed the boat somewhere and didn't use enough mud. I'm not sure how that will affect the experiment overall or if I will have to start over:


For both protocols I collected mud and creek water from Bear Creek in downtown Merced. I was relieved to find that there was enough water still in the creek to collect this late in the year (we haven't had rain for a long time and probably won't until the beginning of November).
For the first protocol, I combined about 4 grams of magnesium sulfate with enough mud from the creek to fill the first 1/3 of my water bottles. I stirred it in a container and then mixed it with filter paper strips. The procedure calls for lab filter paper, which I substituted with coffee filter paper - again, I'm not too sure how well this substitution will work out. I transferred the mud mixture to the water bottles and added the creek water. Then added .2 grams of baking soda and one crushed multivitamin pill. I attempted to remove air bubbles, but I did not feel highly successful in doing so. I let the bottles sit for about 30 minutes and then poured off a little bit of water and covered with plastic wrap and a rubber band. I marked one to sit in sunlight and one to be closed in a box.
For the second protocol I used the instructions from one of the links provided: http://www.personal.psu.edu/faculty/j/e/jel5/biofilms/winogradsky.html, which was apparently created by a Penn State faculty member. I think this protocol is a more traditional source of directions on the Winogradsky Column. For this protocol I used the same mud and creek water and also mixed the mud with magnesium sulfide. However, for the carbon source, I used one of the other recommendations - cut grass. These instructions do not include the use of baking soda or vitamins. I marked both of these bottles as well for one in sunlight and one in the closed box.
Here are the bottles right after mixing, prior to settling as well as a top down image:


The bottles looked like this last night in my window, I think it's clear that I missed the boat somewhere and didn't use enough mud. I'm not sure how that will affect the experiment overall or if I will have to start over:
The chemosynthetic bacteria site was very specific about putting the bottles right away in their dark box, so I didn't take pictures of those bottles (they looked the same - as you see above, the one on the right that is more "yellow" has the baking soda and vitamins added. I packaged my dark bottles in a box and covered them with a dark plastic bag - I'm leaving the box on my kitchen counter because it asks for the conditions to be the same. It gives a good recommendation about viewing them with a red light on a weekly basis, so I'm going to try that:

A couple of other great sites are:
http://people.clemson.edu/~skipper/In%20progress/winogradsky/winogradsky.htm
http://www.sumanasinc.com/webcontent/animations/content/winogradsky.html
Subscribe to:
Posts (Atom)